Tuesday, October 12, 2010

Preserving the last of summer's harvest...

Last week, we started getting little "kisses" of frost in the garden... a sure sign that the end was near. Luckily, we spent several hours harvesting and pulling up most of our veggies and plants before the hard frost came this morning. I think there's still a bit of chard and parsley left, but that's pretty much it!

Much of the vegetables we harvested will be fine for weeks or months to come, if properly stored... many varieties of winter squash, potatoes, onions and carrots. But the tomatoes and peppers were starting to attract my urgent attention after a few days in the fridge and on the counter. I've been canning produce for years. Maybe because of this, I've grown more and more fond of freezing! It's just so much easier! This year we've tried blanching and freezing everything from beans to zucchini, with quite a bit of success. Today I decided to try a few methods recommended to me by friends and folks out in the blog-land. I also wanted to test out the wood pellet grill that we bought at the beginning of the summer.

First, I roasted some Anaheim peppers on high heat, then covered them up to "steam". Instead of peeling them and seeding them right away, as I usually do, I threw them whole into the freezer. I plan to put them in bags, and use them as I need them. Word has it that they peel quite easily when taken out of the freezer and put under running water.
Next I turned the heat down, and smoked and slow-roasted almost all of the tomatoes we had left. I bought some garlic-infused wood pellets just for this occasion. After they'd roasted for 3-4 hours, I took them all off, and ran them through the food processor and into jars to be frozen. I'm really excited about this technique! No peeling, seeding, food mills, or water baths! The consistency of the sauce was incredible! Far better than any I've previously made. I'll try to let you know how it holds up to the freezer, but I suspect they won't last long! In fact, now I'm almost wishing I had more tomatoes.
To cap things off, I made a batch of zucchini bread after supper to eat for breakfast tomorrow!
All in all, we've grown a LOT of vegetables in our garden this year, saved a lot of money, and eaten healthier. As usual, I'm a bit relieved to put the garden to bed this time of year, and focus on a different season and different activities. But it's good to know that summer's bounty will be enjoyed for a long time to come!

Monday, October 11, 2010

My first quilt... completed 19 years later


My husband and I celebrated our 18th wedding anniversary yesterday, on 10-10-10! As a gift to him, I decided to finally finish a quilt that I started for him 19 years ago. It's the first quilt I'd ever made, and I dove into it knowing almost nothing about quilting. It would be 10 years later that I got introduced to rotary cutters, quilt stores, batting and binding. It remained unfinished mainly because after making the top, I didn't know how to bring the back, top and batting all together. I was also not too entirely happy with the result (just LOOK at that orange!), and I still wanted to make it bigger with borders.

So it remained tucked inside my fabric stash, moving from apartment to apartment, house to house. As I later learned more and more about quilting I became concerned about the open button holes, and as my quilting skills progressed this first quilt looked so homely and clumsy. But the sentiment behind it remained the same... a labor of love, made for a special person in my life.

My husband knew about it. He'd seen it move from place to place. Last week, as I pinned it all together, I hoped it would be a surprise gift. As usual, though, it took longer to quilt than I'd figured. I had to drag it out over the week-end in order to finish it on time. The look on his face when he saw me working on it was priceless! He, of all people, knows just how much time I spend quilting a single quilt.

When I first met him, he was a forester who's unofficial "uniform" was plaid flannel shirts. I love rainbows, so I went to the local Goodwill store and found as many colorful shirts as I could to make the quilt. I ended up buying some of the flannel at the fabric store, but could only find the solid blaze orange no matter how hard I looked. I thought it would be neat to leave the pockets and buttons on, and did. I bought a sheet for the back, and cut out the strips with scissors. I probably broke all of the "rules" of quilting all in this one quilt.

In order to finish it, I decided to forget the borders, keep it exactly the way it was, leave the button holes the way they were, use the sheet I still had for the back, and just do it. I started trying to stipple quilt it free-motion on my machine, but after a broken needle and some frustration, I decided to ditch that plan too, and just use my walking foot to make a grid pattern. To make things even easier, I just trimmed the back an inch all around the quilt, and brought it around to the top and sewed it to the front as a "mock binding". Quick, easy, cheap. And it's done!


Sometimes I think all the designer fabric, chic patterns and the long arm finishing does more to impede my quilting process than to help it. I want my quilts to be just like the beautiful ones in the quilt stores, shows, and blogs... But every time I see this once-closeted quilt I'll remember the couple who rented small apartments furnished with second-hand goods, and the time when I bought my quilting fabric from thrift stores. I'll also be reminded of how far I have come in my hobby. More importantly, I'll remember our new romance 19 years ago, and the true reason I love quilting. For me it's a way to show my love to family and friends.

Wednesday, October 6, 2010

9 patch quilt tip


Lately I've been spending a lot time on the computer exploring the quilt blog world. It's so much fun to see others' quilting projects, and there is so much inspiration out there. Many blogs are also very informative, as quilters are always eager to share their knowledge. For busy moms like me, it's a wonderful resource! With little (or big) kids in tow, it's almost impossible to take a class, or join a guild. Add to that the rural location that I've lived in for the last few years, and books and blogs, chat boards and magazines have become my main go-to when learning new things. My local quilt shops have been a great resource as well, and I try hard to support them as much as I can.

Even though I'm relatively new to the quilting world, I thought I'd return the favor and share a tip that I learned this summer about piecing 9-patch (or similar) quilt squares. 9 patches are like tic-tac-toe boards... 9 squares, 3x3. I'm working on a quilt that uses a 9-patch, so I took some pictures of my newly learned method.

Put simply, instead of strip-sewing all the same pieces in "like" batches, I take a little more time initially and sew them in the order of the finished patch. I sew all the "left" seams first:

Then the "right" seams:


I then cut the blocks apart, keeping the 2 middle threads still attached.

Now I just fold them over, and repeat the process, finishing the 3rd and 4th seams.


It uses less thread, and I believe that it also makes the process faster. Of course it does take some concentration, and if you're like me, it's hard to concentrate on sewing like this when the kids are home. Luckily mine are now in school several hours a day :-). But even with them gone, I still make mistakes....

I'll be the first to tell you that I'm not the best teacher (just ask my kids), so I hope this makes sense. Happy piecing everyone! Cant' wait to show you my latest quilt as it progresses.

Monday, October 4, 2010

Contests and day tripping

Over the week-end, I decided to take a day trip that I've wanted to take ever since we moved here, almost a year ago. I packed the kids and the dog into our car and set out for Joseph, Oregon and Lake Wallowa.

As we headed down Hwy 82, which is also designated as "Hell's Canyon Scenic Byway" broad farmlands narrowed down to rim rock, then to the steep canyon of the Wallawa River. As the valley opened up, we saw dozens of people fishing in hip waders in the river. The Wallowa Mountains towered over us as we continued driving through the towns of Wallowa and Enterprise.
Finally we arrived at the town of Joseph, Oregon, just North of Lake Wallowa. Joseph is a town surrounded by beautiful mountains, wilderness and water.
It's not too surprising that it is also home to many artists who give the town a touch of class and comfort. While we didn't have much time to shop or eat at the many places in town, we did stop at "Cattle Country Quilts", a wonderful quilt store with lots of outdoors and wildlife fabrics. They recommended a stop at R and R Drive-In for yummy milkshakes for the drive back.

With Hell's Canyon and the Eagle Cap Wilderness still out there to explore, I'm sure we'll be back very soon to this beautiful corner of the state.

In regards to travel, I wanted to take the opportunity to mention a travel contest that Travel Oregon is having right now. It's a "Wanderfeast", a culinary trip through Oregon that you design yourself. Details can be found at their website. I'm afraid I can't enter because of my parental obligations, but maybe one of you can!!

For my fellow quilters, I also just entered into 2 contests for an Accuquilt Go! Cutter at the "Diary of a Quilter" Blog, and at "Alderwood Quilts" Blog. If you're interested, head to their websites and enter! Doesn't everyone love a contest?

Wednesday, September 29, 2010

Almost there....

The electricians came on Monday to install our solar panels and inverter. It took them a good 5-6 hours, but by mid-afternoon (a sunny one), we had them all installed and I got to watch as our analog electric meter ran backwards!!! So awesome! Unfortunately, we had to turn it all off almost as soon as it was up and running, as we still need a variety of inspections to take place. Once they pass, the the electric company (Pacific Power) will come and install a new digital meter and hook us up to the grid. With the weather we've been having, I hope we can be producing electricity very soon. We're hoping by next week. Living in Eastern Oregon, I am told that the electric company only has a half dozen or so reps on this side of the state, so it could be even longer. It all depends on their schedule. I'm hoping to get a call soon for the inspections. We've been warned that this is one of the toughest parts of the whole process... knowing that you're able to power your house with solar but being unable to until it gets all signed off.

If any one's interested, I'll step you through a lay person's perspective of how it all happened. As mentioned before, we first had the roofers come and install the support system. Monday the crew unpacked the solar panels, hoisted them on top of the roof installed them to the rack and hooked all the wires together.

They then crawled inside our attic and ran all the wires through the roof to a wall in our garage, next to the circuit breaker. They installed 2 new circuits in the breaker box, and also put in an inverter and an independent meter that tells us just how much electricity the panels produce over their lifetime. The inverter converts the direct electric current (DC) that the solar panels produce to the alternating current that the grid uses (AC) It also has a screen that tells us a lot of various statistics. Here's a "before and after" picture.

The new digital meter that Pacific Power will install will be able to calculate our usage and the amount of power we generate. Any excess will be used to power our neighbors houses and the excess will be credited to our account. Unfortunately they don't have a "buy back" program, so we won't be making any money, but we'll save money, since our bills will be lower. And yes, we'll have to save over more than a few years to pay off the cost of the array too. For that reason, as well as financial and spacial concerns, we kept the array smaller than what we'd need to fully power our house. Since we're hooked up to the grid we also don't have to use batteries too. If the power goes out on the grid, our panels get shut off as well, due to safety concerns for the line workers. So it's a bit different than a stand-alone solar array, but that's not a bad thing.

I'll be sure to let you know when we start soaking up the sun!!

Monday, September 27, 2010

If at first you don't succeed...

I'm trying.... AGAIN!

I'm about to enter the 4th quarter contest for "All People Quilt". I had a lot of fun with the last challenge, did much better than I thought I would, and decided to give it another go!

The challenge this time was to create a pillow with a appliqued flower on the front, edge trim and little rosettes in the center.

At least I think that's the challenge. For a creativity contest, the pattern this time seemed a bit constrained. I'm still pretty new to the whole contest world, so decided to throw caution to the wind and use a little creative liberty. Also, win or lose the contest, this pillow is mine, and I wanted to create something that I'll actually use. But that leads me to another issue that I have with this project... Ever since we got our pup, throw pillows have become pretty scarce in our house.
Add 2 boys to the mix, and... well, you get the picture. I'm not sure I'll even be able to use this pillow in our home decor, but it was a lot of fun to make!

My flower is the "fleur de lis". It's probably the most ubiquitous symbol of Louisiana, and after Hurricane Katrina, it has become a prominent symbol of hope. I used the Mardi Gras colors of gold, green and purple. I had some of the coin trim laying around that I got from Wal-mart when they closed their local fabric department last winter (75% off). It reminds me of the doubloons they throw from the Mardi Gras parades. It was a bear to sew on. I ended up using a "reverse blanket stitch" from my machine to sew it without breaking too many needles on the beads above the coins. The math involved with the diamond pattern also stumped me! Anyone know how wide of a fabric strip to cut to get a certain diagonal length 30 / 60 degree diamond? I'll figure it out one day. In the end, I just winged it, and it turned out fine.

Originally I was going to applique a black boarder completely around the gold fleur de lis, ala "Saints" Football team, but after looking at some "3-dimensional quilt patterns, and talking to my 12 year old son, came up with the idea of a shadow effect instead. Who knew my 12 year old son would be such a creative quilting genius! He has zero interest in sewing, but has been my biggest fan when it comes to this contest. What an amazing thing it is when the kid I've encouraged and rooted for all these years suddenly starts doing the same for me!

One last thing I learned, concerns shopping for fat quarters. I originally was going to use this green fabric, I bought at a quilt show in Walla Walla, Wa (love saying that!). It's about an hour away from where I live. When I got home and opened it up with the others, I was horrified to see that it was 2 different colors. I guess I'll be checking this more carefully in the future. Luckily the local quilt store had a green batik that I could substitute.

Wish me luck!!!

Thursday, September 23, 2010

Fried okra

Anyone who knows me well, knows that I LOVE fried okra. It's my favorite vegetable. I probably could eat it every day. Unfortunately, living in Oregon, I rarely get to eat this treat. This year, though, we were able to grow some in our garden. Okra likes really hot weather and a long growing season. That's probably the main reason you don't find it outside of the South. But I have had some success growing it, both in Southern Oregon, and now in the Pendleton area. It doesn't get huge, and now that the nights here have gotten cool the production has screeched to a halt, but I grew enough with 20-ish plants to serve it maybe 4-5 times as a side dish for our family of 4. I hope to plant even more next year. I did spot some at a local growers market recently, but sadly, it was all way too big and tough. But I'm encouraged to see it. I have yet to see it in any grocery store here, but would on rare occasion see it in Southern Oregon when we lived there. If you're lucky enough to have it in your grocery store or farmer's market, give this recipe a try. These pictures are from what will probably be out last batch this year from our garden :-(.

First of all, you need to select fresh green small pods of okra, as pictured above. Okra is pretty fragile and bruises and browns (and molds) easily. It'll keep up to a week or so refrigerated if fresh. I start by slicing off the stem caps.

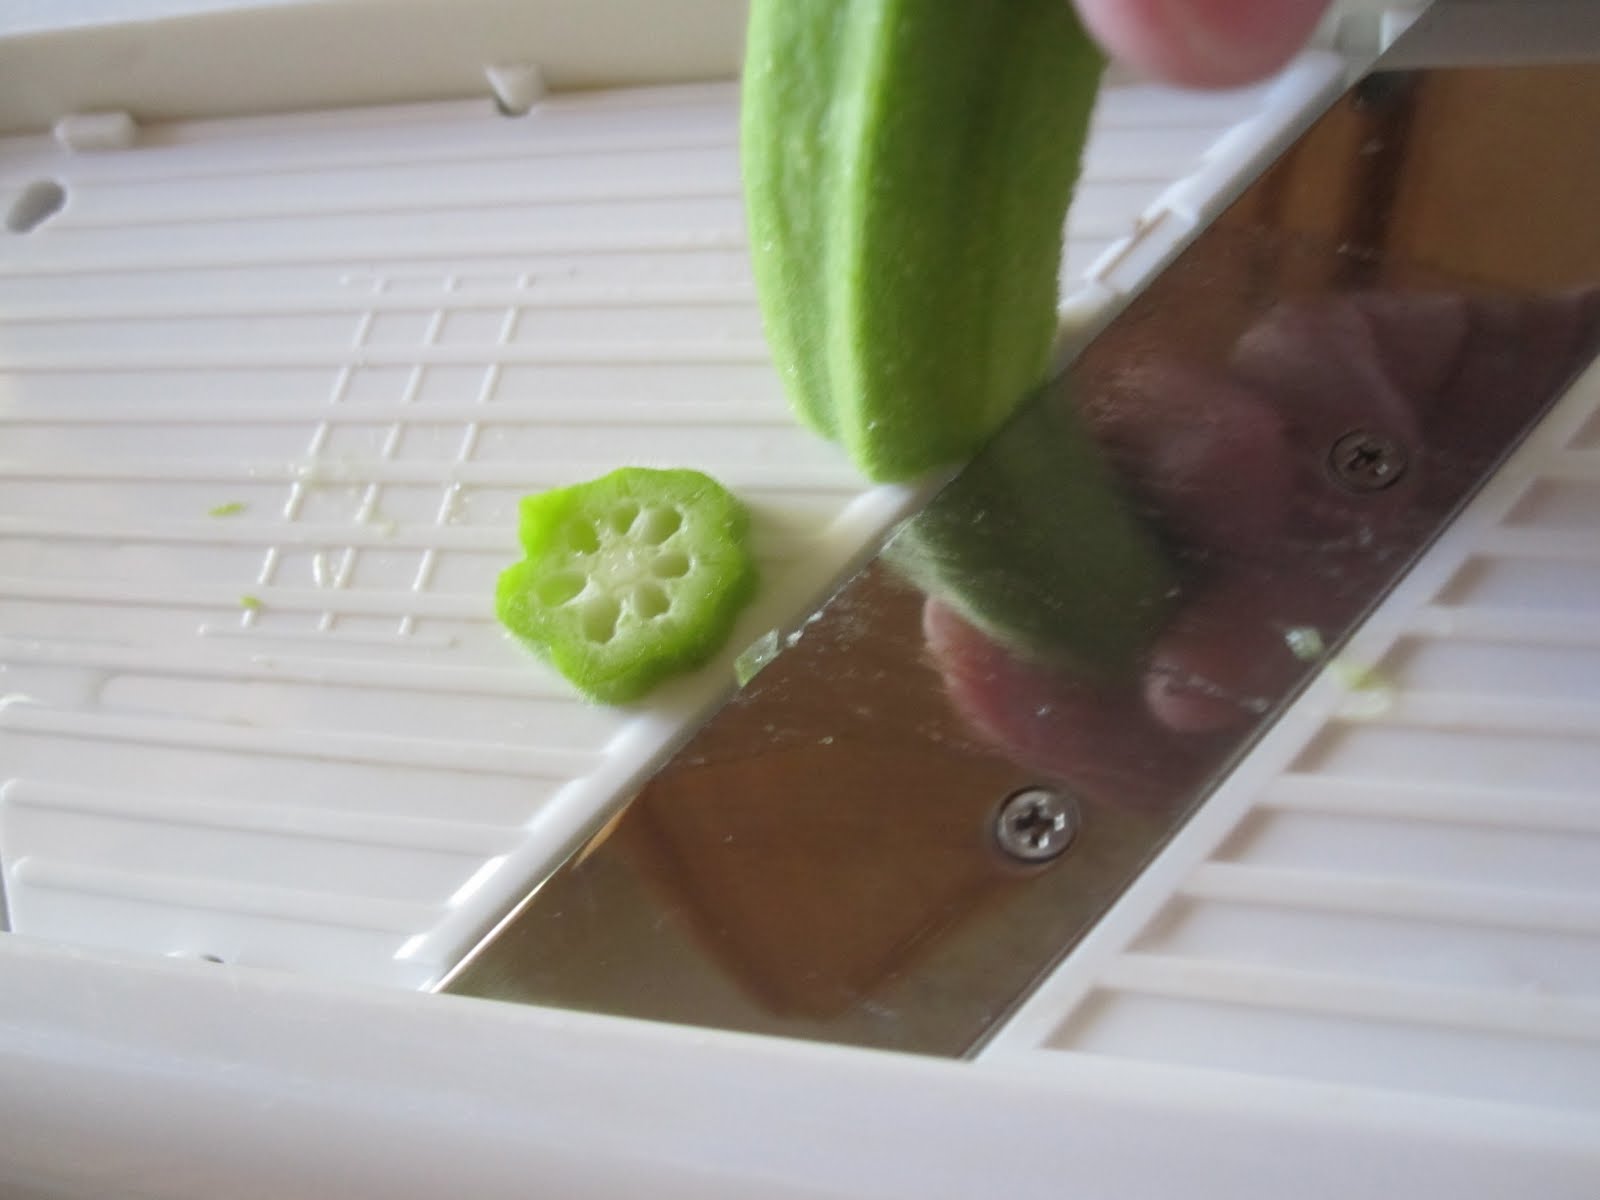
I grew up using a paring knife to slice the okra into rounds of about a 1/4 inch, but discovered that using a mandoline slicer makes the job quicker, easier and more uniform. I bought mine for under $20.
Once all the okra has been sliced, I "bread" it with equal parts flour and cornmeal. My mom used to put it all into a paper bag and shake it. I just add it to the bowl and give it a stir. Okra is naturally very sticky, so there's no need to add any eggs or milk to make it stick! I also add a small amount of salt, but you can add this once it's cooking to taste.

Next, I heat up about 1-2 tablespoons of vegetable oil in the skillet. My grandma used to use bacon fat that made it SO good, but I prefer to use canola oil. Over medium heat, fry or saute the okra until it's tender and medium brown. I usually stir it frequently to keep it from burning... every minute or so, and it typically takes me about 15-20 minutes. My kids have learned (from me) the tradition of nibbling the okra as it cooks, so I always make extra for nibbling.
Some people like Tabasco on the okra after it's served, others, a little pepper. I just like it with a little salt, and we all fight over who gets the last bit from the pan, because all the fried breading crumbs that fall off are also yummy! Enjoy!